Blog → Cooling the MSI GF63: real undervolting for the i5-12450H and 6 more methods
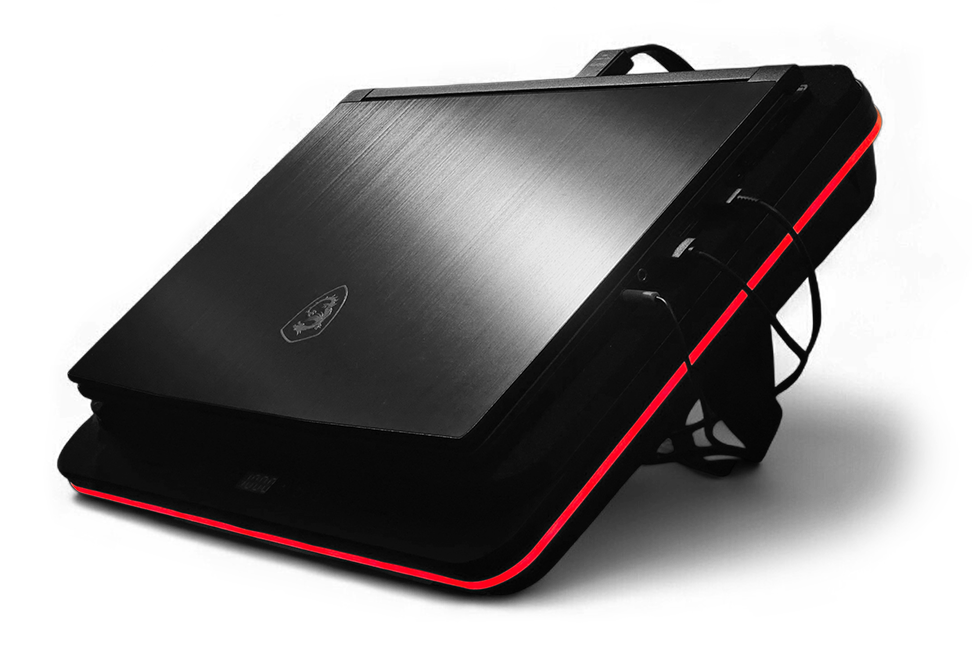
A few years ago, I switched from a PC to a laptop. I didn’t spend much time choosing and just went with the simplest
I then made some upgrades: a 1TB
Long story short, I managed to solve this problem without putting the laptop in the fridge, attaching a water cooling system (yes, people actually do that), or even using Peltier elements – heaven forbid. On my unit, I dropped CPU temperature by ~25°C at idle and ~20°C under load without huge performance loss.
There is no silver bullet here. It’s a complex set of methods that I will list below, including both the obvious ones and those that are less talked about. Their effectiveness varies, depending on the specific processor die, ambient temperature, and how the laptop is used. These methods should be applied in combination, but selectively and with their drawbacks in mind.
It is assumed that the laptop is used primarily in a stationary setting – some methods will reduce battery life.
Phase-change thermal interface material
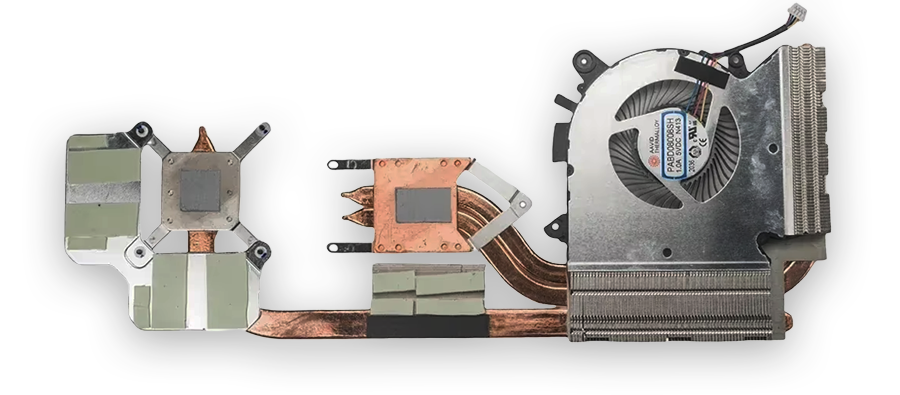
The stock thermal paste is only good enough to get the laptop to turn on in the store so the buyer can see Windows booting up. There’s nothing else good to say about it, so it should be replaced immediately.
The aforementioned
Cooling stands
The very first primitive solution was a cooling stand. Simply raising the laptop was obviously not enough, so I chose the
Does it work? Yes, the GT626 definitely lowers the temperature by 10-15°C during certain peak loads, but it doesn’t prevent sudden spikes up to 80-85°C, further temperature increases, or throttling when performing particularly demanding tasks, such as indexing a couple hundred megabytes of code. Additionally, at its maximum speed of 2800 RPM, the fan is as loud as a plane taking off.
Is this or a similar stand worth it, given the drawbacks? Yes, it is. First, at acoustically acceptable speeds up to 1200 RPM, it still lowers the temperature, albeit slightly. Second, its design includes a dust filter, and anything trapped in it won’t get into the laptop itself. Third, it has a USB hub that draws power from the mains, thereby reducing the load on the motherboard’s power circuits.
MSI Cooler Boost
Enabling Cooler Boost in
So, if you don't mind the noise (which is still much quieter than an IETS cooling pad) and are okay with replacing the fan and
Switching graphics tasks to dGPU
In this MSI laptop, the power of the
Reducing Power Limit (PL1/PL2)
PL1 is the maximum sustained power of the processor, PL2 is the maximum short-term power of the processor. Measured in watts.
A common piece of advice found online boils down to the following: since undervolting on the 12450H is not possible (actually, it is possible – more on that later), you need to limit the CPU’s total power via ThrottleStop. In doing so, it will automatically throttle the frequency under load to avoid exceeding the limit. Depending on the specific processor die and performance requirements, limits ranging from 35/45 to 55/65 are recommended.
Yes, with low power limits, the processor will run noticeably cooler... And much slower. Therefore, it’s better to start by limiting the cores’ turbo frequencies.
Limiting frequencies
The aforementioned ThrottleStop allows you to limit the maximum frequency of
Frequencies are adjusted in the
With default settings, the i5-12450H in the
After limiting Turbo frequencies it makes sense to set a
Undervolting i5-12450H using Loadline adjustment
The CPU operating voltage is usually lowered using the
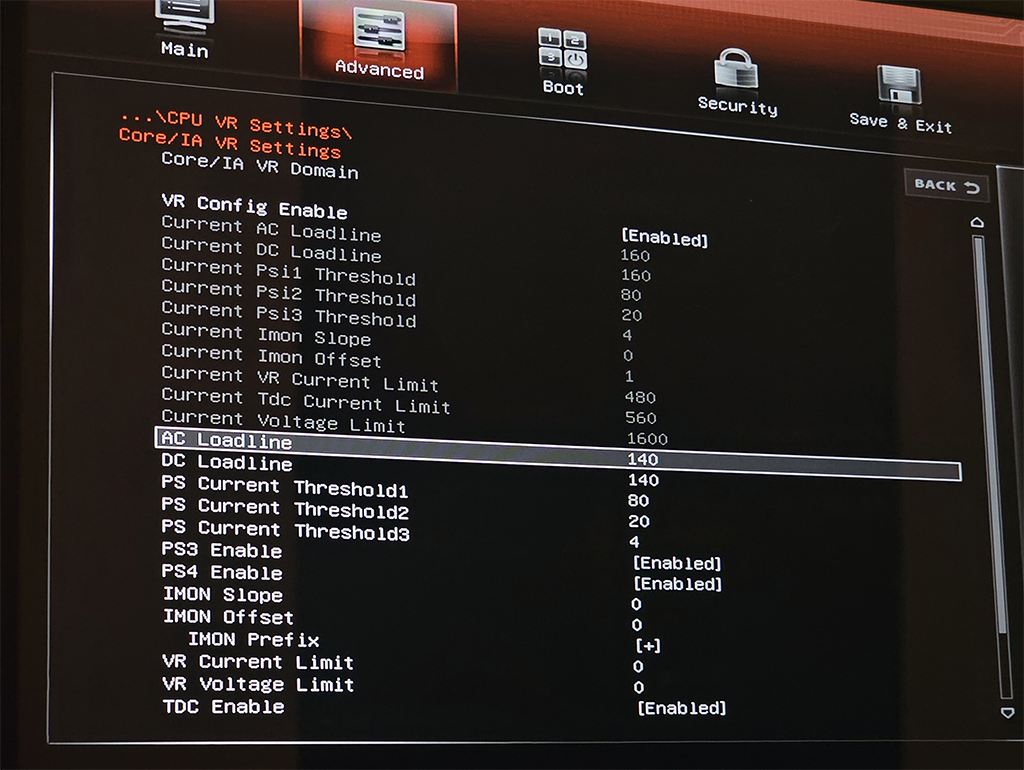
A bit of theory. When the motherboard supplies more current to the processor, the voltage drops. To compensate for this drop, the processor requests a higher voltage from the motherboard. The “additional” volts are calculated using the formula
For the 12450H processor on the MSI GF63, the default
Load-line adjustment is done via the BIOS, but you may need to enable hidden settings first. To do this, press the following key combination:
The optimal resistance depends on the specific processor unit. It’s safe to start with
It is generally considered that adjusting the loadline is a safe method of undervolting. Potential issues include:
- If you lower the loadline too much, you may experience BSODs under load or an even more insidious problem – clock stretching, where the actual processor frequency is lower than the declared frequency. Signs of this situation in HwInfo64:
Effective Clock values are significantly lower thanCore Clock (should be checked at 100% CPU load), the “Yes” flag next to IA: Turbo Attenuation. - If you lower the Loadline critically, there is a theoretical chance that the processor won’t start at all and you won’t even be able to enter the BIOS. This can be fixed by resetting the CMOS.
Too low voltage does not cause physical damage to the processor.
Finally, a few words about the battery.
As mentioned at the beginning, I’m assuming that the laptop is primarily plugged in and its battery life isn’t a concern (many of these methods will significantly reduce it).
If you really do use your laptop this way – plugged in all the time – it makes sense to extend the battery’s lifespan in general – to prevent it from degrading prematurely or failing. Lithium batteries, as we know, don’t like being kept fully charged for too long, which is why MSI lets us set a charge limit of 50-60%. For whatever reason, this option is located in the